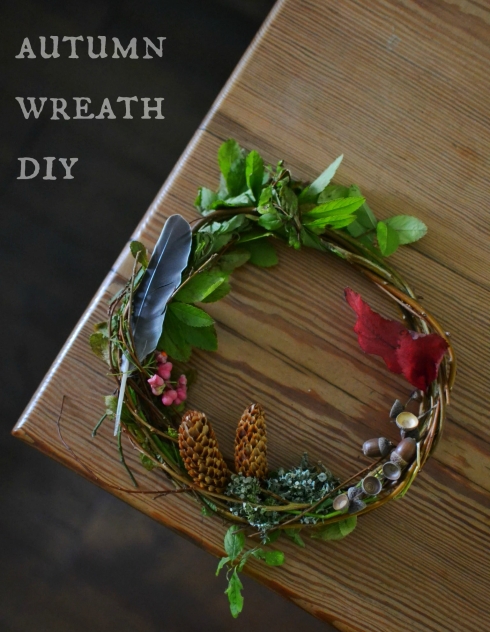
Autumn is the most beautiful and intriguing time to live in the countryside. It’s when I get my strongest cavegirl tendencies and I love gathering nuts, berries and mushrooms to cook and preserve. Inspired by the return of Nature in the Home this week I decided to get crafty with my autumn gatherings (instead of eating them!) and make something pretty to bring indoors.
1) Start off by making a base for your wreath. I took advantage of the heap of prunings in the garden and grabbed a handful of spiraea but there’s no science to this and any slim, flexible stems will do. Take a small bunch in your hands and bend them round into a ring, twisting the stems together as you do. At the top of your circle, cross the tops over and wind the loose ends back around the ring to create a basic wreath. Tuck in any escaped twigs. I left on some of the fresh leaves but snip them off if you want a longer-lasting decoration.

2) Get out and about and gather up some interesting autumn bits to decorate your wreath. Even if you live in the city you should be able to collect plenty of colourful leaves, pinecones and feathers in your local park.
3) It’s completely freestyle from now on! The basic wreath can be adapted using whatever natural ingredients you can find. I set out to try and make this wreath with only natural elements (no wire or glue) as I always find it inhibitive to have to assemble materials before I get started. Instead, use the twisted stems of you wreath to weave in the decorations – there should be spots all around where you can tuck them in tightly.
{Project and photos all Decorator’s Notebook blog}
That’s it! The best thing about this project is that each and every wreath is going to be different and the basic idea will work just as well in other seasons. Make your own Christmas wreath for the holidays by adding fircones, evergreen foliage and red berries or an easter wreath with lots of feathers and blossom. Mine hasn’t completely dried out yet, but I can’t see any reason why the twiggy wreath base wouldn’t last and be reusable again and again.


This is just gorgeous. You’ve inspired me to have a go too :)
Claire.x
This is so gorgeous & I love the idea of an Autumn wreath xx
Lovely, do you get your willow online, or is it just gathered from the great outdoors?
Lovely – do you get your willow online, or is it just gathered from the great outdoors?
I didn’t actually use willow for this – just some stems pruned from a shrub growing in the garden! You could definitely use willow for this wreath though if you had some to hand.
oh this is gorgeous! I love the idea of an autumn wreath, thanks for the tutorial! x
This is just lovely, thanks for sharing!
Perhaps I could make better use of the treasures my toddlers keep collecting… Beautiful wreath :)
lovely. I adore the addition of the feather. Now I want to make on with found objects!
Gorgeous, Bethan! I’ve made Christmas wreathes, but love the idea of an Autumn one.
Lovely wreath. Looks so simpleand with a great effect.
Hugs,Margaret
What a gorgeous idea!
Stunning!