Archive | Weekend recipe RSS feed for this section

Chocolate Cloud Cake

17 Feb

Flourless chocolate cloud cake recipe - Decorator's Notebook (592x800)

Dust your cake tin with cocoa to stop your chocolate cake from sticking (800x590)

Chocolate Cloud Cake Recipe - dark chocolate pieces (593x640)

Dark Chocolate Cloud Cake Recipe - Decorator's Notebook (533x800)

{Photographs: Decorator’s Notebook | Recipe: adapted from Sophie Dahl}

I’ve never been to heaven, but I bet this is what angels eat for breakfast. Light as a feather, gooey in the middle and completely flourless, this may not be the prettiest cake you’ve ever made, but I promise you it will be one of the yummiest!

CHOCOLATE CLOUD CAKE

300g plain chocolate, broken into pieces

225g caster sugar

175ml boiling water

225g salted butter, cubed

6 free-range eggs, separated

2 tsp vanilla extract

1 | Preheat the oven to 180 ͦ c / Gas Mark 4. Grease a 23cm springform cake tin then dust the base and sides with cocoa.

2 | Place the chocolate and caster sugar into a food processor and whizz until a fine powder forms. Add the boiling water, butter, egg yolks and vanilla. Blend again until smooth and well combined. Transfer to a large mixing bowl.

3 | Place the egg whites into a separate glass bowl and whisk with an electric beater until you have stiff, snowy-white peaks. It’s essential that your bowl and beaters are absolutely clean before you do this as the slightest bit of grease will stop your egg whites whisking properly… I rinse mine with boiling water and dry them with a fresh tea towel to make sure.

4 | Fold the egg whites into the chocolate mixture with a metal spoon, in two additions, until just combined. Pour into the prepared cake tin and bake in the centre of the oven for 45 – 55 minutes until a skewer inserted into the centre of the cake comes out with just a few moist crumbs. The cake will still look wobbly – this is a good thing as it means it will have a lovely gooey middle.

5 | Run a knife around the edge of the cake straight away then allow the cake to cool completely in the tin. It will quickly sink but don’t worry… this is all part of its rustic charm! When cool, chill in the fridge for 2-3 hours before serving on its own or with creme fraiche and red berries.

TIP: This cake gets even better on the second day so it’s a perfect prepare-ahead dinner party dessert.

Homemade gingerbread gift tags & garlands

15 Dec

Welcome to everyone joining us today from Sunday Times Style – it’s lovely to have you here!

I was thrilled to be invited to put together an idea for their Christmas gift wrap feature this weekend. These edible gingerbread tags start giving before your gift has even been opened – a definite bonus! If you fancy trying these sweet little biscuits for yourself, here’s the recipe and instructions you’ll need:

Gingerbread gift tags Decorator's Notebook blog recipe

Decorator's Notebook gingerbread cookies recipe

Gingerbread gift tags for Sunday Times Style by Decorator's Notebook

Decorator's Notebook gingerbread garland

{Photographs © Decorator’s Notebook}

Gingerbread Biscuits

It took quite a bit of experimentation to work out the recipe for perfect gingerbread biscuits that hold their shape when baked and taste delicious too. Thank you to Emily at Maid of Gingerbread for the tips!

100g butter
100g soft brown sugar
3 tbs treacle
1 tbs golden syrup
140g plain flour
140g self raising flour
1 tsp ground ginger
1 tsp ground mixed spice
 

1) Preheat the oven to 180°c / Gas 4. Line a baking sheet with parchment.

2) Place the butter, treacle, syrup and sugar in a small pan and warm gently until the butter has melted and the sugar has dissolved. Meanwhile, sift the flour and spices into a mixing bowl.

3) Add the contents of the pan to the dry ingredients and mix well. Once combined, kneed gently to form a smooth, stiff ball of dough. Wrap in clingfilm and chill for 30 minutes.

4) Roll out the dough to 2mm thick on a floured surface and cut out the shapes using your favourite cutter. Use a straw to make two holes in the centre of each biscuit then transfer to the baking sheet. Repeat until all the dough is used.

5) Bake for 8-12 minutes until golden brown. Keep a close eye on them as the cooking time will depend on the size of the cutter you used. Cool on a wire rack then store in an airtight container.

Makes about 32 biscuits

Gingerbread recipe Decorator's Notebook blog

[click the image above to enlarge and save]

gingerbread gift tags and garland recipe Decorator's Notebook

{Photographs and recipe © Decorator’s Notebook}

Once you’ve made your gingerbread men there’s a host of ways you can use them… tying them onto Christmas presents is just the start!

  • Thread a row along a length of pretty ribbon and hang along the mantlepiece (not too close to the fire!)
  • Make one hole in the top of the biscuits instead of two and pop them on your tree
  • Tie around napkins as an extra treat on the table
  • Get the kids decorating them with tubes of icing to give to their friends and teachers

Have fun and thank you for visiting our blog… you’ll find lots more Christmas craft and decorating ideas here and please do have a look at the Decorator’s Notebook Shop for gorgeous gifts to wrap inside your parcels and luxury ribbons for the perfect finishing touch!

Decorator's Notebook Shop www decoratorsnotebook.co.uk

Finnish Cinnamon and Cardamon Buns

16 Sep

I am a HUGE fan of Kinfolk magazine and their new cookbook will be firmly on my Christmas list. If this recipe for Pulla (a Finnish bread flavoured with cinnamon and cardamom) is anything to go by, it’s going to be my new favourite.

Finnish Pulla recipe Kinfolk

rolling dough for Finnish Pulla bread Kinfolk

recipe Finnish cinnamon buns Kinfolk

cinnamon buns recipe Kinfolk

Pulla Finnish cinnamon and cardamom bread Kinfolk

{all Parker Fitzgerald for Kinfolk Table}

I just love the flavours of cinnamon and cardamom and my mouth is watering just from looking at the pictures! Head over to the beautiful Kinfolk website for recipe (brownie points to the team for including both UK and UK quantities). Perfect for a lazy brunch, don’t you think?

A hungry girl’s guide to chicken-keeping: part 1

5 Aug

You don’t need to be good at maths (and I’m not) to know that three chickens, one person at home and everyone else on holiday means an awful lot of these…

fresh free range eggs

Our three lovely chickies have been laying one egg each a day and even though I’ve been giving them to the neighbours… well, when there’s only one neighbour that doesn’t really help. So, I’ve been trying my best to find different things to do with them, my current favourite being an invention I am calling Garden Baked Eggs.

baked eggs

I’m calling it that because thanks to that one neighbour, we are lucky enough to have a constant supply of homegrown veggies in exchange for the eggs, so almost everything I threw into this came from either our garden or his.

ingredients for baked eggs

I’ll tell you what I put in by way of illustration, but everything apart from the eggs and some kind of cheese can be substituted depending on whatever you have to hand. That’s why this is such a good recipe!

Garden Baked Eggs

for each person

Two free range eggs

Small handful each of sliced courgette, mushrooms, broad beans and red pepper

Three slices of chorizo, roughly chopped

Feta cheese, cubed

Lots of chopped fresh herbs (I used chives and oregano)

Tablespoon red pesto

Salt and pepper

Knob of butter and drizzle of olive oil

1) Drizzle a little olive oil into a shallow individual baking dish and brush around the inside. Turn the oven on at about 180ºC / Gas Mark 4 and put another larger baking dish inside. Put the kettle on.

2) Melt the butter in a frying pan and gently saute the veggies with some salt and pepper until softened.

3) Pile the vegetables into the small dish then sprinkle over the chorizo and feta. Make two wells in the mixture and carefully break an egg into each one.

4) Dot the pesto on top, sprinkle with herbs and grind over more black pepper.

5) Place the small dish inside the larger one, then carefully pour boiling water into the big dish so it comes about halfway up the sides of the little one.

6) Cook in the oven until the top is golden and the eggs are as done as you like them – I like the yolk still a bit runny – so about 10-15 minutes.

baked eggs recipe close up

Yummy for lunch with salad and a big slice of crusty toast. Thanks girls!

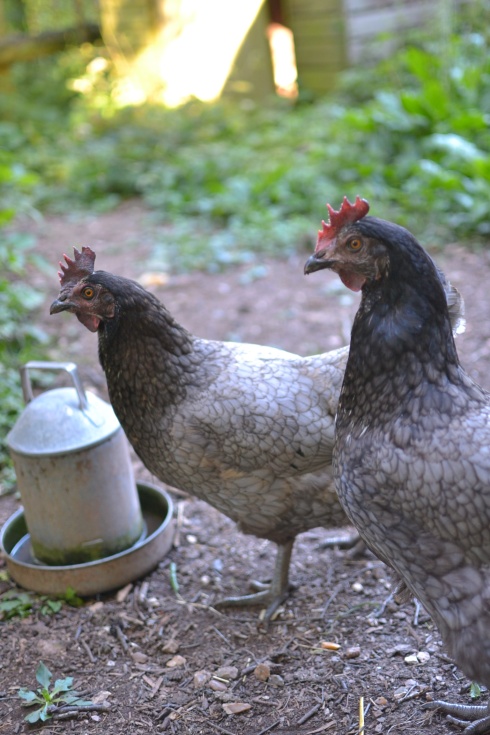
grey free range hens{all Decorator’s Notebook}

15-minute make: rhubarb mojito

26 Jul

I love rhubarb. I love mojitos. No further explanation needed.

rhubarb mojito cocktail recipe

Rhubarb Mojito

for each glass

65 ml  white rum
4 tablespoons rhubarb syrup (recipe below)
5 mint leaves
1 tablespoon lime juice
½ teaspoon lime zest
pinch nutmeg
lots of crushed ice
thinly sliced rhubarb and mint sprigs to garnish
 

1) Pop the nutmeg, lime juice, zest and mint leaves into the bottom of the glass and muddle together using the end of a wooden spoon until the mint leaves are well bruised and smelling gorgeous.

2) Add the rum and rhubarb syrup. Stir together then fill the glass to the brim with crushed ice. Finish with a garnish of rhubarb slices and mint sprigs.

rhubarb mojito cocktail

Rhubarb Syrup

3 small stalks of chopped rhubarb
225 g caster sugar
500 ml water
¼ teaspoon cinnamon
¼ teaspoon nutmeg
½ vanilla bean (optional)
 

1) Place all the ingredients into a small non-stick saucepan. Bring to the boil then reduce to a simmer for 5-7 minutes.

2) Remove from the heat and allow to cool. The extra syrup with keep in the fridge for up to two weeks and is delicious drizzled on ice-cream, greek yogurt or strawberries.

rhubarb mojito recipe{recipe (adapted) and photographs Not Without Salt}

15-minute make: garlic, rosemary and chilli almonds

3 May

With the bank holiday weekend approaching and drinks with friends (or if we’re lucky, a picnic) on the horizon, these spicy nibbles are perfect for today’s quick recipe. And yes, clock-watching readers – you’ll be well shy of 15 minutes on this one. Let’s just say I’ve given you five minutes to collect the rosemary from the garden!

garlic rosemary and chilli almond recipe{adapted from The Passionate Cook}

Garlic, rosemary and chilli almonds

1 teaspoon olive oil

200g almonds

2 cloves garlic, crushed

2 large sprigs of rosemary, leaves only

1 teaspoon dried chilli flakes (or adjust to taste)

1 teaspoon coarse sea salt


1) Gently heat the olive oil in a heavy-based frying pan then add the almonds. Sizzle gently for 3-4 minutes until heated through and beginning to brown a little.

2) Add all the other ingredients, apart from the sea salt. Stir well to coat the almonds and heat for 1 minute more (take care not to burn the garlic, which can become bitter).

3) Line a bowl with kitchen paper and tip in the nuts. Shake around a little to soak up any excess oil then sprinkle with sea salt.

4) Pop into a serving dish and enjoy with a glass of bank holiday Pimms!

I hope you have something lovely planned for the next few days. I have a couple of little excursions on the cards so will be back on Tuesday to catch up!

Ne’er cast a clout ’til may be out

22 Apr

seeded bagel with smoked salmon and scrambled eggs

This was my first Saturday since I finished my mentoring that I’ve actually been able to relax and have some time to myself. I was determined to be as lazy as possible, so I got up decadently late then cooked a scrummy brunch in my pjs.

hawthorn may blossom

I went for a walk in Crystal Palace Park (which is right opposite my flat so took no effort whatsoever) to enjoy the lovely sunshine. The may has finally blossomed so I cast my jacket and socks. It felt good!

feet on grass with green shoes{all Decorator’s Notebook}

After a couple of hours exposing my ghostly skin to the sun, I headed homeward to search for a new WordPress theme for my blog – I can’t believe how hard it is to find one I like! I am looking for a clean, simple design with a traditional one column layout, a proper sidebar and room for a header image at the top. Not hard you’d think, but lots of the ones available now seem to look more like website than blogs with a static front page of thumbnails which click to open individual posts rather than a scrolling format.

Should I be considering them? Do you mind blogs with a fixed front page like that or do you still prefer more traditional blog designs?

I’d love to know what you’ve done if you use WordPress.com too…

NEW: photographic deliciousness from Good Company magazine

1 Apr

This such an interesting time to be working in magazines, as print and digital publications rise, fall and battle for supremacy. I think it’s too early to say how it’s going to end, but there’s no doubt that there have been some online launches recently that are every bit as inspirational as print mags. Good Company is the latest and serves up visually delectable food content centred around three core themes: people, tools and ingredients.

vintage plates Good Company magazine

vintage kitchenalia Good Company magazine

chalkboard kitchen tools

vintage style restaurant design Good Company magazine

root vegetables

{all Good Company}

As well as mouthwatering recipes, interesting interviews and gorgeous pictures, I love how Good Company is designed too. Rather than dressing up the pages with whizzy embedded videos and clickable everything, there’s a cheeky nod to paper with watercolour patterned pages and photographed book pages to separate each section. I like that.

Read Good Company online here.

15-minute make: homemade honeycomb

8 Mar

When I was doing my A-levels I had a Saturday job as a waitress in a local hotel. On my way back and forth to the pot wash I’d stop by the pastry kitchen to watch and scrounge. It was there I discovered the alchemy that is homemade honeycomb (cinder toffee).

homemade honeycomb cinder toffee recipe

I think it’s one of the easiest yet most impressive sweet treats you can possibly make, so it’s perfect when you need a little present to take to a dinner party… or pop it into a pretty box or jar and surprise your Mum for Mother’s Day on Sunday.

Homemade Honeycomb

100g caster sugar

4 tablespoons golden syrup

1.5 teaspoons bicarbonate of soda

Silicone mat or baking parchment

Optional extras: nuts, seeds, coconut shavings, melted dark chocolate

1) Put the sugar and syrup into a large non-stick saucepan, mix together then put on a medium heat. Resist the temptation to stir the mixture once it’s on the heat. Just watch it carefully as it melts, then turns into a golden brown goo. This will take about three minutes

2) Take the pan off the heat then whisk in the bicarbonate of soda and watch the magic happen! The mixture will transform into a foaming golden cloud – tip it immediately onto the silicone sheet / baking parchment. Sprinkle over the nuts, seeds and coconut if using.

3) Leave the honeycomb to set and cool then break into shards. Dip or drizzle with melted dark chocolate if you like, although I think it’s absolutely scrummy just as it is.

cinder toffee hokey pokey recipe{Photographs At Down Under / Recipe adapted from Nigella Lawson}

I urge you to try this – it’s so easy and so much fun to make. And it tastes like funfairs!

15-minute make: mulled wine syrup

14 Dec

perfect mulled wine recipe

Here’s an odd quirk of mine – I really dislike wine (red, white, rose, sparkling – everything) but I love mulled wine. I’m not sure what that says about my taste buds, but it makes perfect sense to me! So, today’s 15-minute make is a gently-spiced mulled wine recipe that just tastes like Christmas… and makes your house smell like it too. There’s a little more to it than the regular teabag-in-a-pan method, but you end up with a lovely syrup base that can be bottled and used on another occasion. A bottle of this mulled wine syrup would make a nice last-minute homemade Christmas present too.

mulled wine syrup recipe

Mulled Wine Syrup 

Makes 12 servings

1 orange
1 lemon, peel only
150g golden caster sugar
1 cinnamon stick
5 cardamom pods, gently bashed
5 cloves
Pinch grated nutmeg
Splash of red wine
 
Add to…
2 bottles of fruity red wine
150ml ginger wine
Orange slices to garnish
 

1) Squeeze the juice from the orange and place in a large pan together with the orange shells, lemon peel, sugar and spices. Add a small glug of wine (just enough to cover the sugar) and heat gently  until the sugar has dissolved, stirring every now and again. Bring to the boil and bubble for 5-8 minutes until you have a thick syrup. At this stage you can leave the syrup to cool slightly then pour into a sterilised bottle. If you’re thirsty now, carry on…

2) Turn the heat down and add the red wine and ginger wine to the saucepan. Warm through gently, giving it a stir occasionally Have a taste and add a touch of sugar or lemon juice if you need it. Serve in heatproof glasses garnished with orange slices.

mulled wine ingredients{Photographs Hannah Queen / Recipe adapted from Felicity Cloake}